Your Office in the Woods
When we think of car camping, we often picture a tent or open air sun shade, cooler, cook stove, folding chairs, and mountain bikes atop an SUV or minivan. Car camping allows ready access to beautiful, even if not terribly remote places.
But for me, car camping is what I do when I need to quickly get away from the insanity of the city, even if I continue working. With 4G mobile data, the speeds are sufficient for email, web research, multi-channel conference calls, and the upload of draft film edits. So, why sit in a stuffy office in a stuffy building with stuffy people when you can instead be working from your favourite campsite?
Exactly. So, all we need is power.
To work from the primary car battery is not a good idea. Yes, it functions, but standard lead acid batteries are designed for short, high amperage discharge to start your car, not the continuous drain of a low-wattage cell phone charger or laptop power adapter. While AGM batteries are becoming more common, and deliver both the power to start your car and consistent supply for electronics, concern remains for monitoring your battery to make certain you can start your car again. If you are all alone in the middle of the National Forest, running your car every 2-3 hours might be ok. But if in a campground, the fumes are annoying, the sound obnoxious. Why not go solar?!
This photo essay is how I converted my 2000 Subaru Forester into the ultimate camping car with a continuous supply of 110V power, day or night, supplied by 100% renewable nuclear fusion—the sun.
Parts
Each of the following are available from Amazon, save the battery and 12V power socket which I purchase from a local auto parts dealer:
- Renogy 100 Watts 12 Volts Monocrystalline Solar Panel
- Renogy AK-20FT-10 10AWG Adaptor Kit Solar Cable PV with MC4 (F/M) Connectors
- Renogy TOOL-MC4 Solar Panel Mc4 Assembly Tool
- Morningstar Sunsaver TrakStar 15 Amp MPPT Charge Controller 12V/24V
- Renogy Solar Panel Mounting Z Bracket Set of 4 Units RV Boat Off Grid Roof
- [brand] 12V / 7AH AGM battery
- 12V power socket with mounting bracket
- Morningstar SI-300-115V-UL 300W pure sine wave inverter
- Household 110V A/C power socket and toggle switch to trigger the inverter ON/OFF
Design & Planning
What these photos and this essay do not convey is the amount of time spent in measuring, sketching, measuring again, and planning the layout of this project. One does not just drill holes in the roof a car, even a 16 year old car, without some careful consideration.
I likely spent equal time in Ace Hardware, working with one of the helpful employees to find the best way to accomplish the task at hand, as I did implementing each task.
This project required 3-4 hours a day for 5 days, or roughly 20 hours start to finish.

If you can find a way to bring the cables from the solar panel into the car interior without drilling holes, by all means do this. You thereby avoid potential water damage and of course, drilling holes in the roof of your car.
On my prior 2003 Outback Sport, I was able to do this because the solar panel I applied was lower wattage and therefore used thinner electrical cables. With this 100W panel, I stuck with the suggested 10g wire which with its thick insulation was pinched by the opening and closing of the rear hatch. So, drill holes I did.
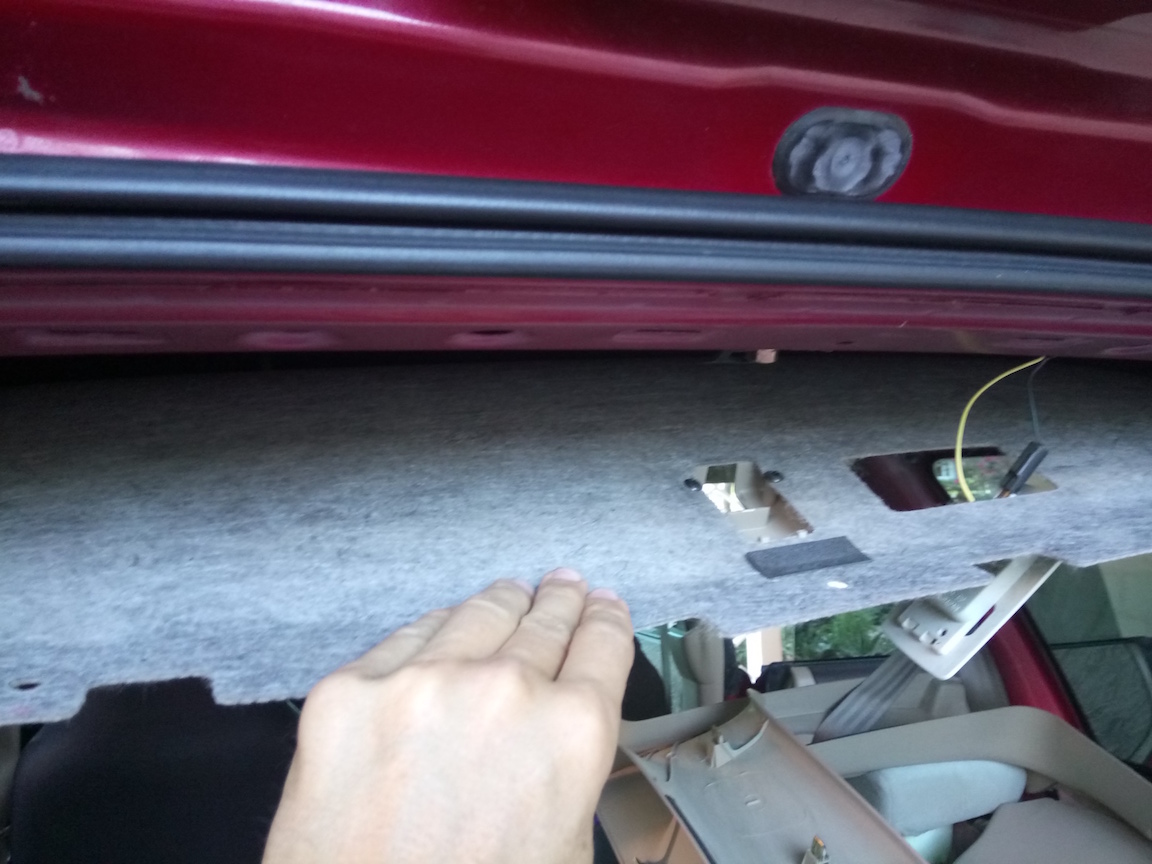
If you must drill holes, remove all interior panels required to lower (or remove) the ceiling panel, allowing access to the metal of the roof, where the holes will be drilled. In selecting the location of the holes, I took into account the cross bar which I most certainly wanted to avoid, the placement of the panel and where the power leads terminate, and the physical constraints of the water proof adapters employed for the task.
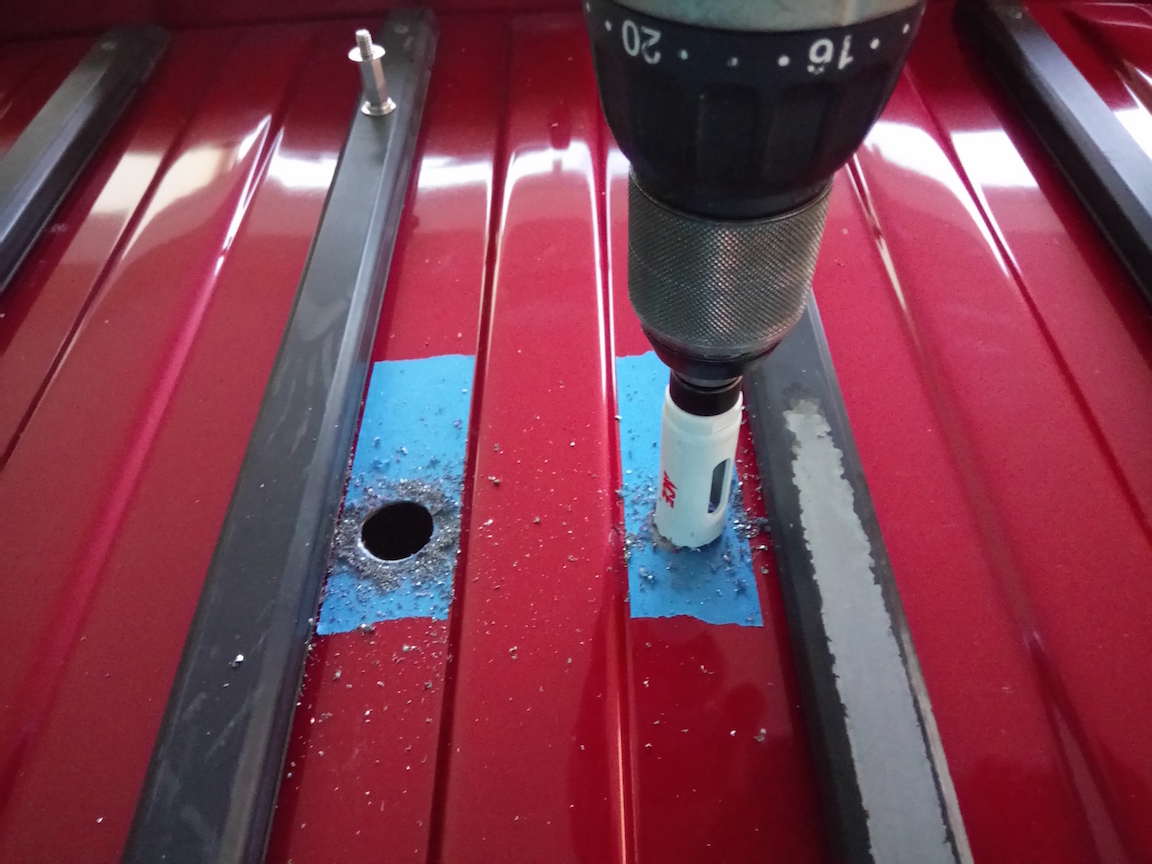
I used a multipurpose hole saw which adapts to a drill bit. Let is spin at nearly full speed, press lightly, and be ready to catch the whole contraption before it punches through if you did not remove the interior panel. Else, you may accidentally drill through that too.
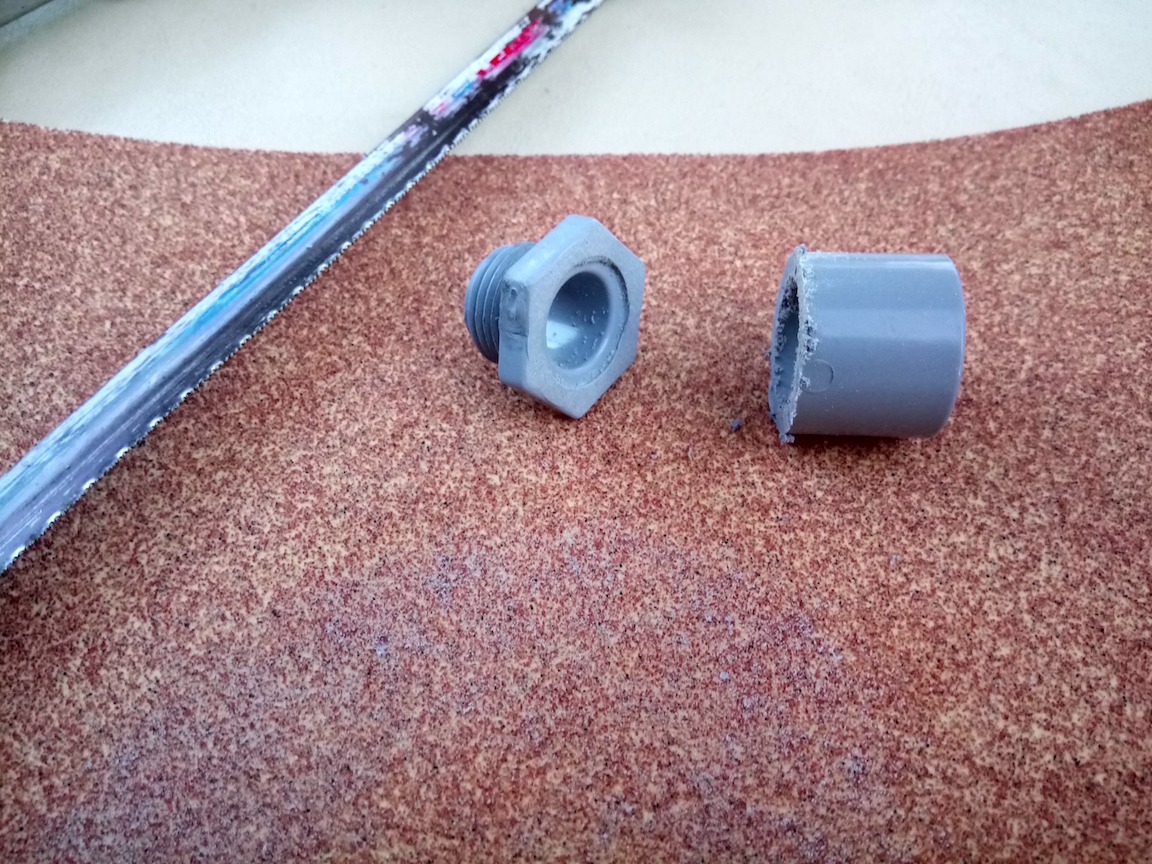
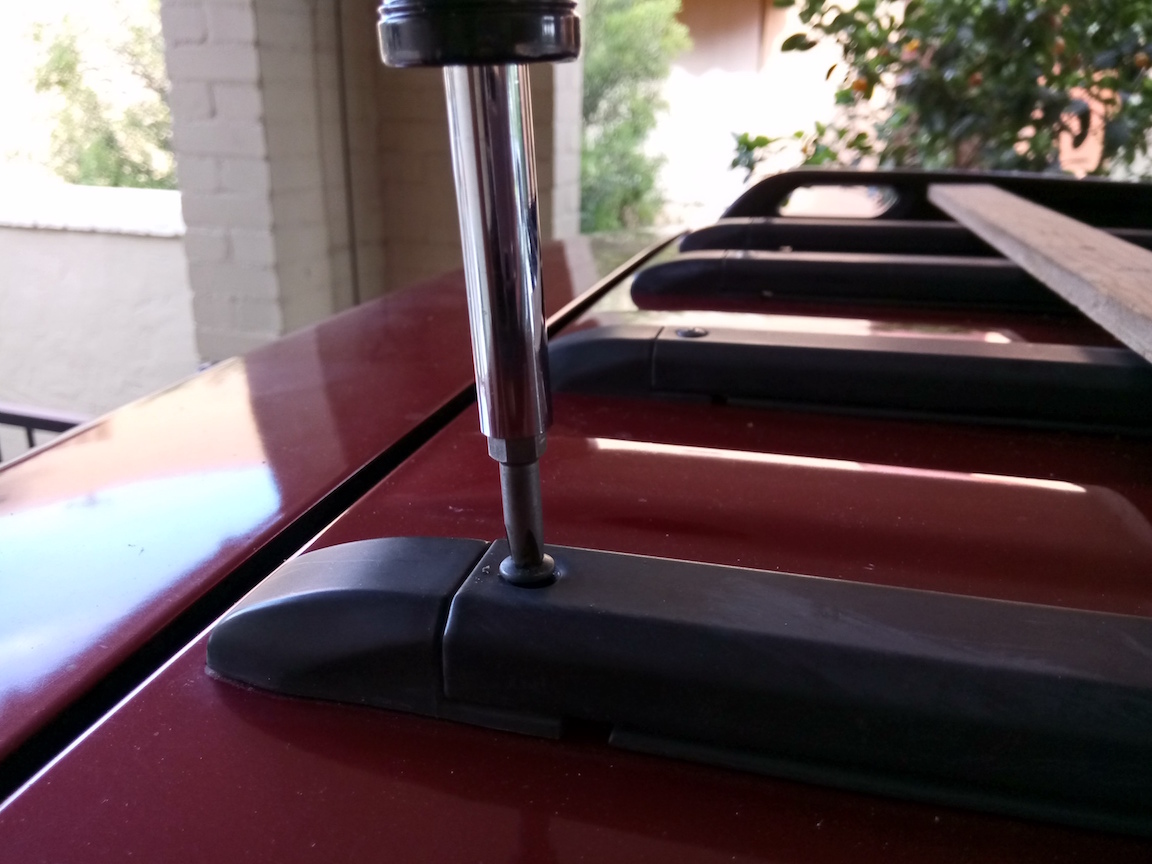
I experimented with a number of water tight fittings at the hardware store before I discovered these nifty right-angle adapters which have both a removable plate for helping the wire make the bend, and a water tight fitting which when turned, closes around the wire at the end. The silicon rubber ring is a separate purchase. I had to ask the manager to look when the clerk was unable to find what I needed. Ultimately, they had the right one to both fit over the threads of the threaded fitting and seal to the roof of the car. I did not use any adhesive, and it is 100% water tight against the car wash, garden hose, and weather.
Of course, you want to select the hole saw to match the diameter of the threaded nut as close as is possible.
You will also note that I used a metal hack saw and 120 grit sand paper to reduce the depth of the threaded nut to a minimum profile so as to not press against the upper (hidden) side of the roof panel, allowing the thick solar cable to bend over the widest arc possible.
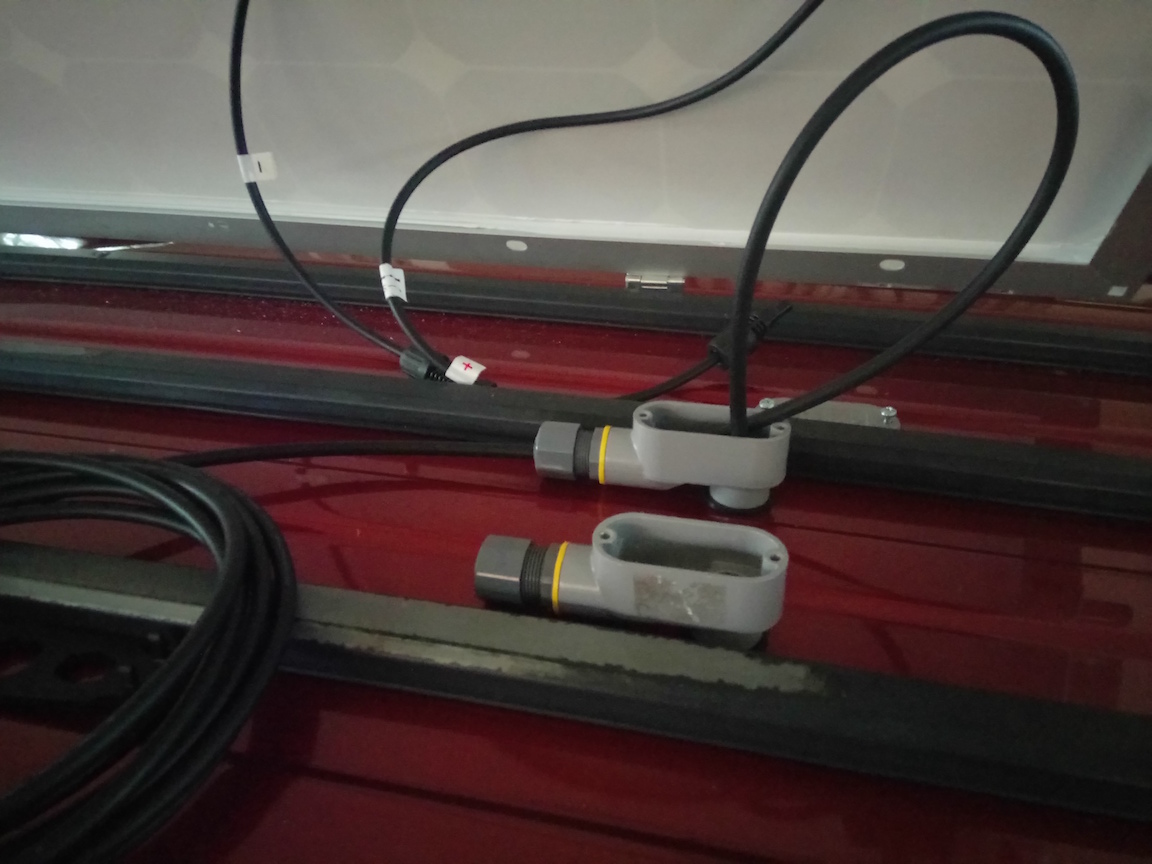
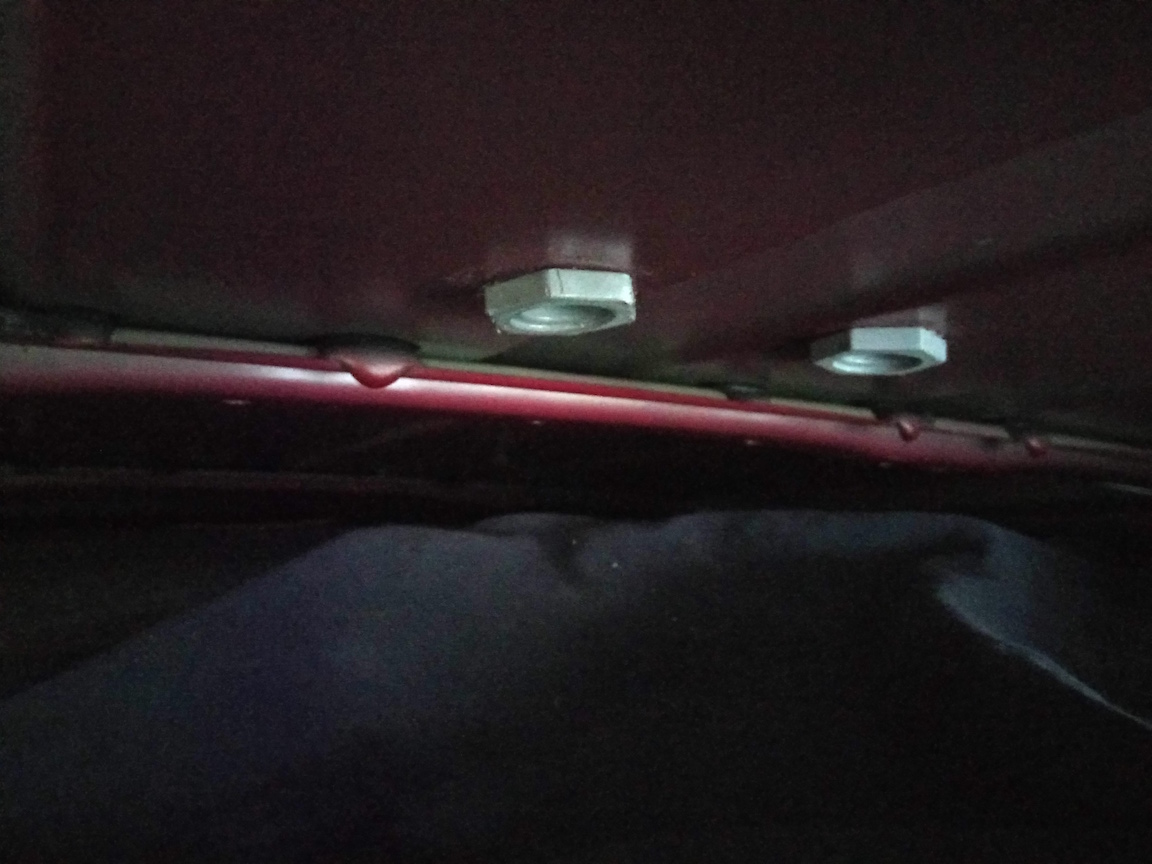
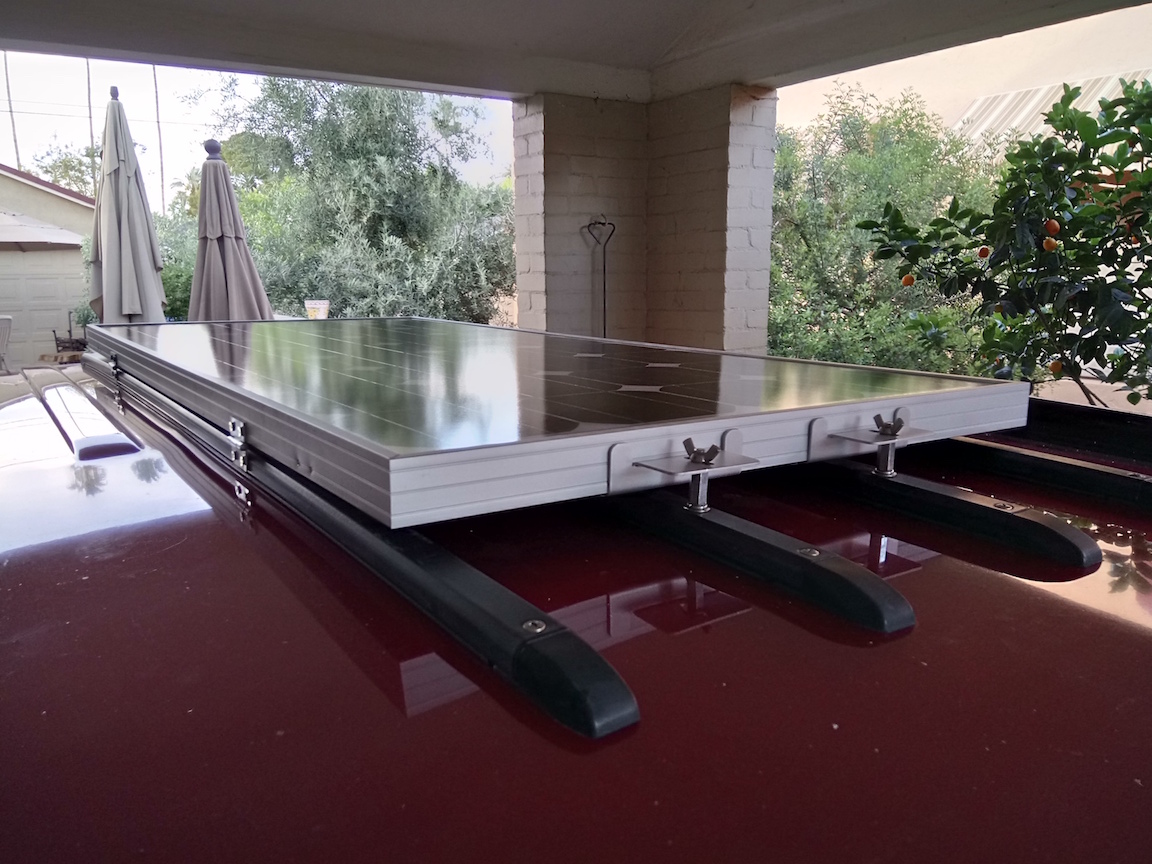
The final installation is both professional in its appearance (if you consider plumbing parts on the roof of your Subaru to be professional), low profile for minimum air resistance, and water tight (see above, left). Once the cables are routed above the ceiling panel and down the interior of one of the two rear beams, you are ready to replace all the interior panels.
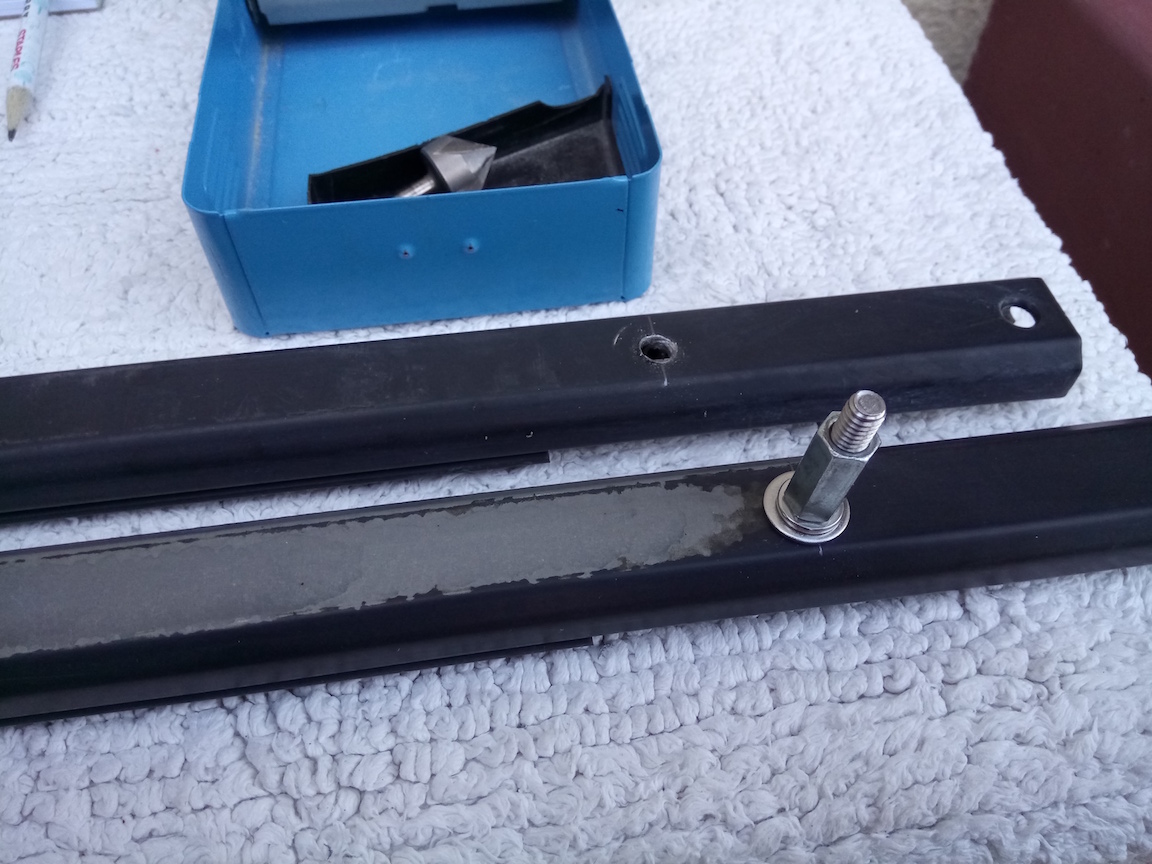
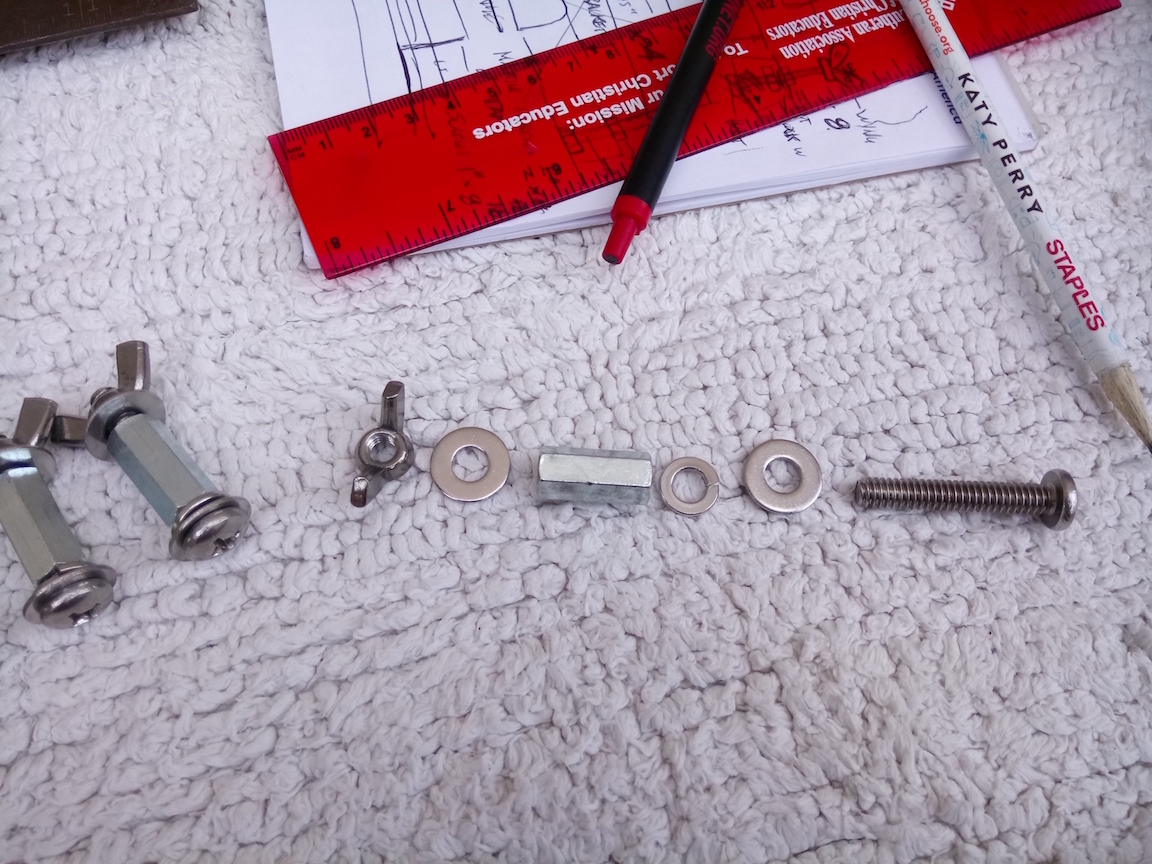
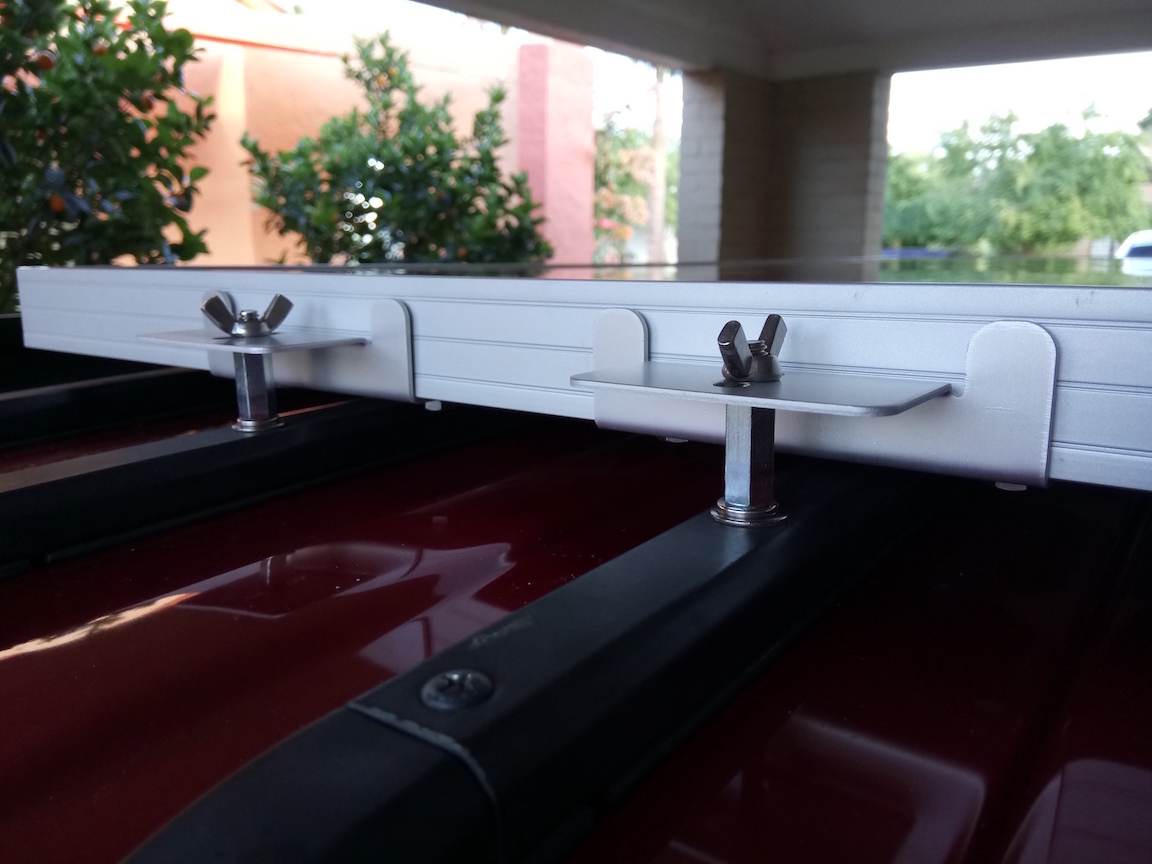
The mounting of the solar panel will be specific to your vehicle. I found a way to use the existing roof rails (above, right) in which I drilled holes and inserted bolts from the bottom up. Using lock washers, I was able to fit thread dowel nuts onto the bolts, creating a surface onto which the panel brackets rest. When the wing nut is tightened, the panel is completely snug, not the slightest vibration.
All of this took a significant amount of careful measurement, so take our time, check all measurements twice, and do it right the first time.
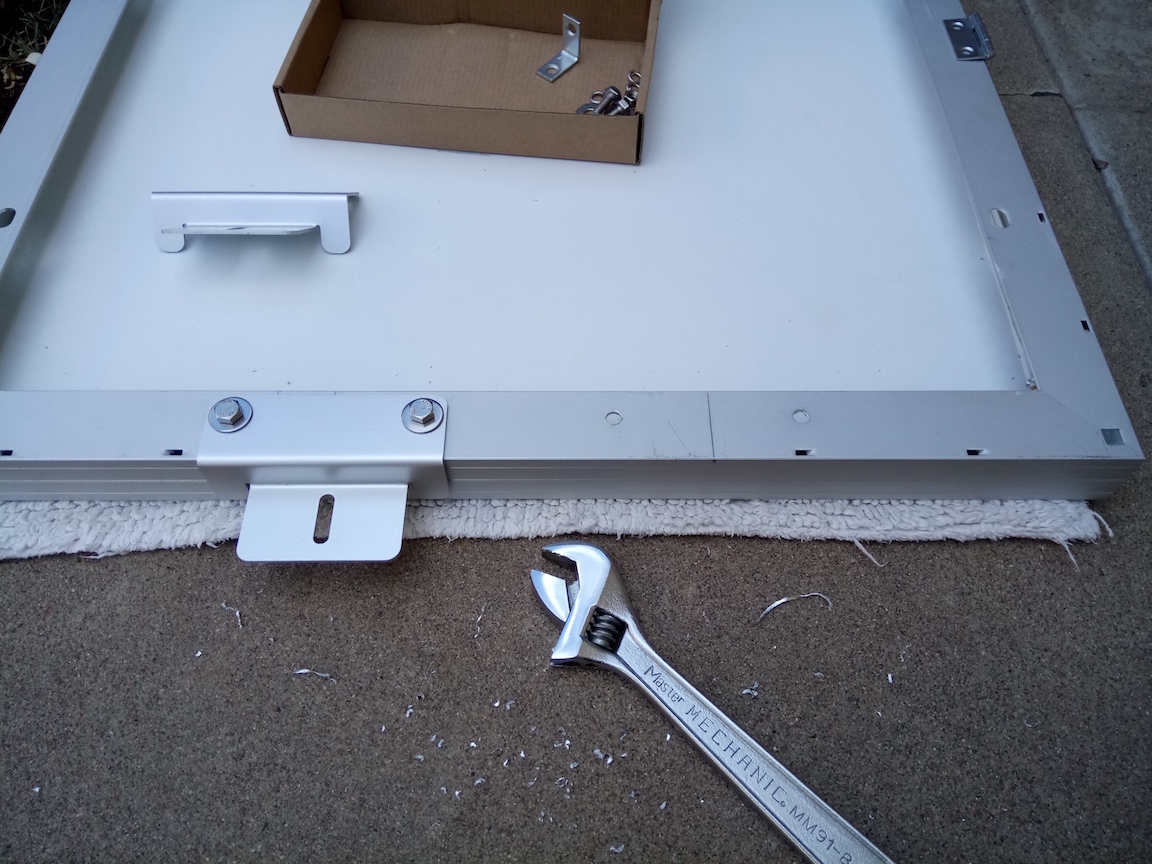
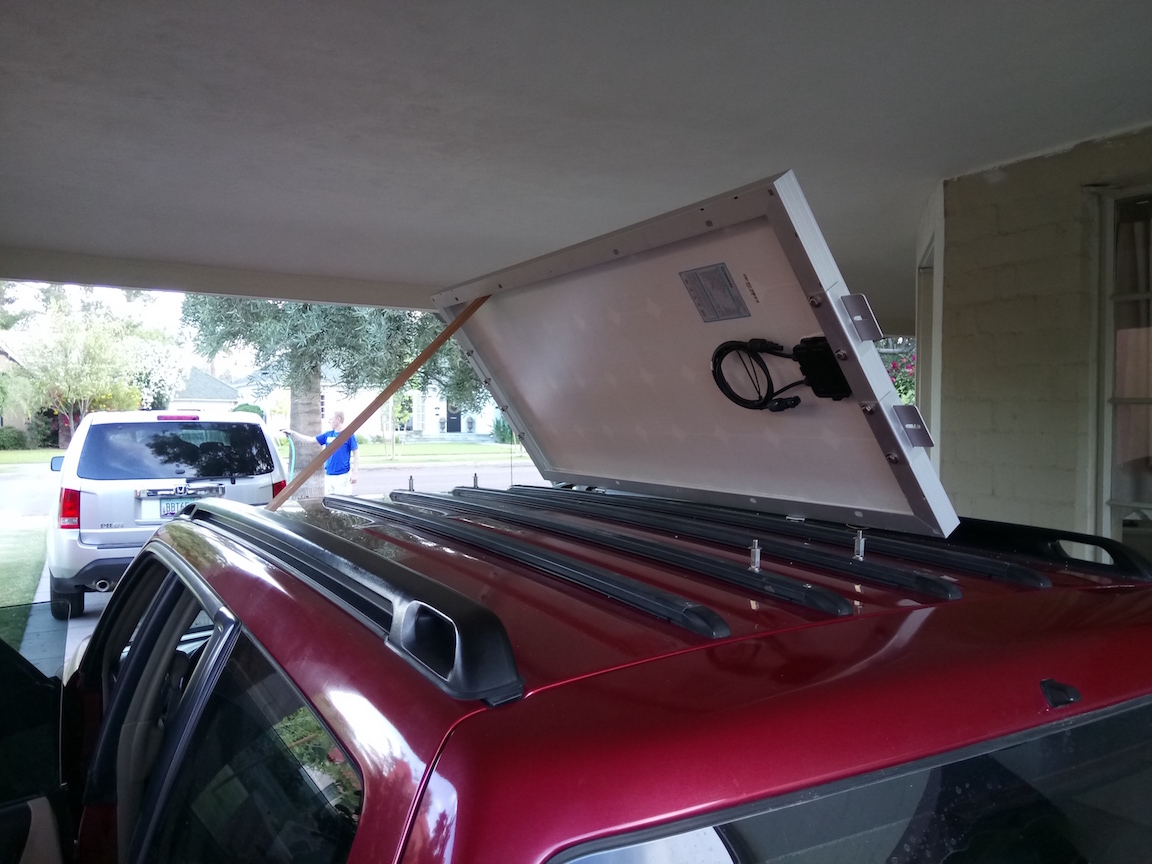
Mounting the panel itself was a bit tricky. I used the brackets ordered along with the panel, but in a way they were not intended. Designed to attach to the side of the panels, I drilled new holes along the ends, again carefully measuring so as to fit perfectly to the bolts which press through the roof rails. The only messy effort is the need to make the holes in the mounting brackets slightly oblong so as to accommodate the angle of the panel when it lowers onto the bolts.
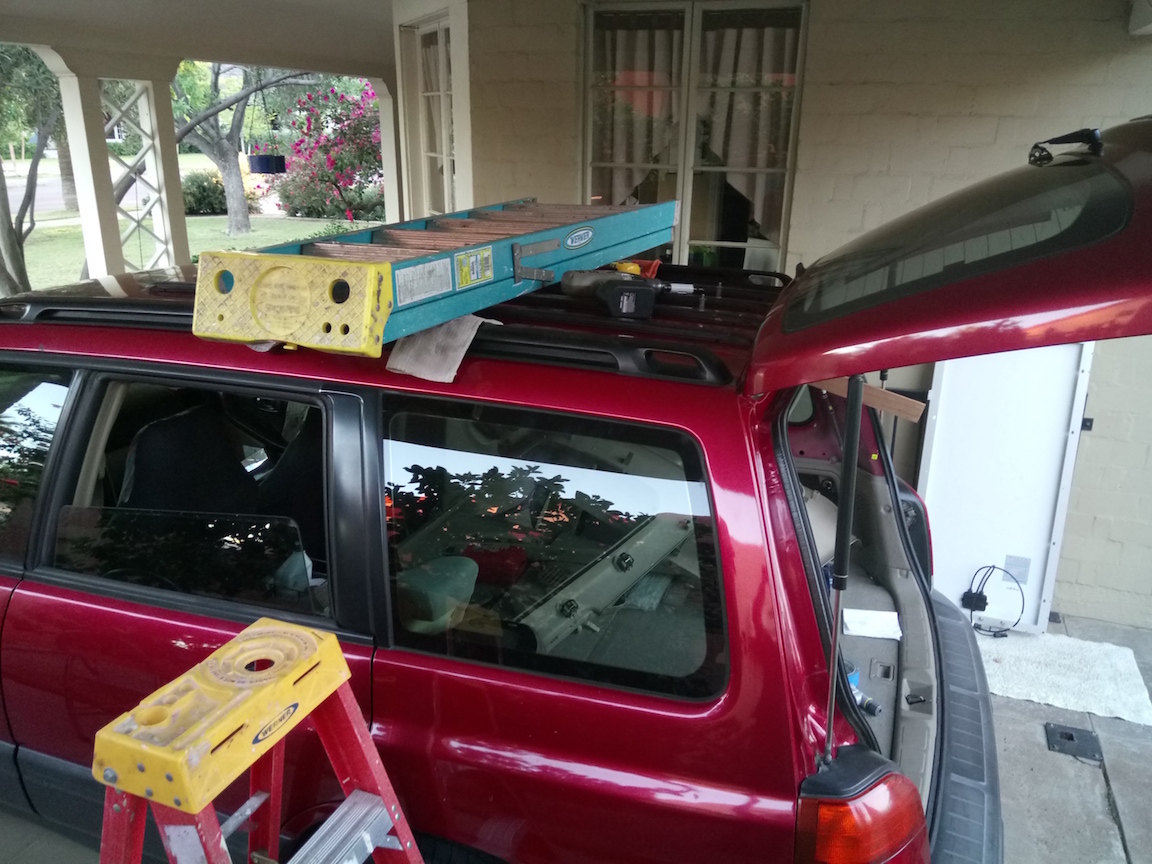
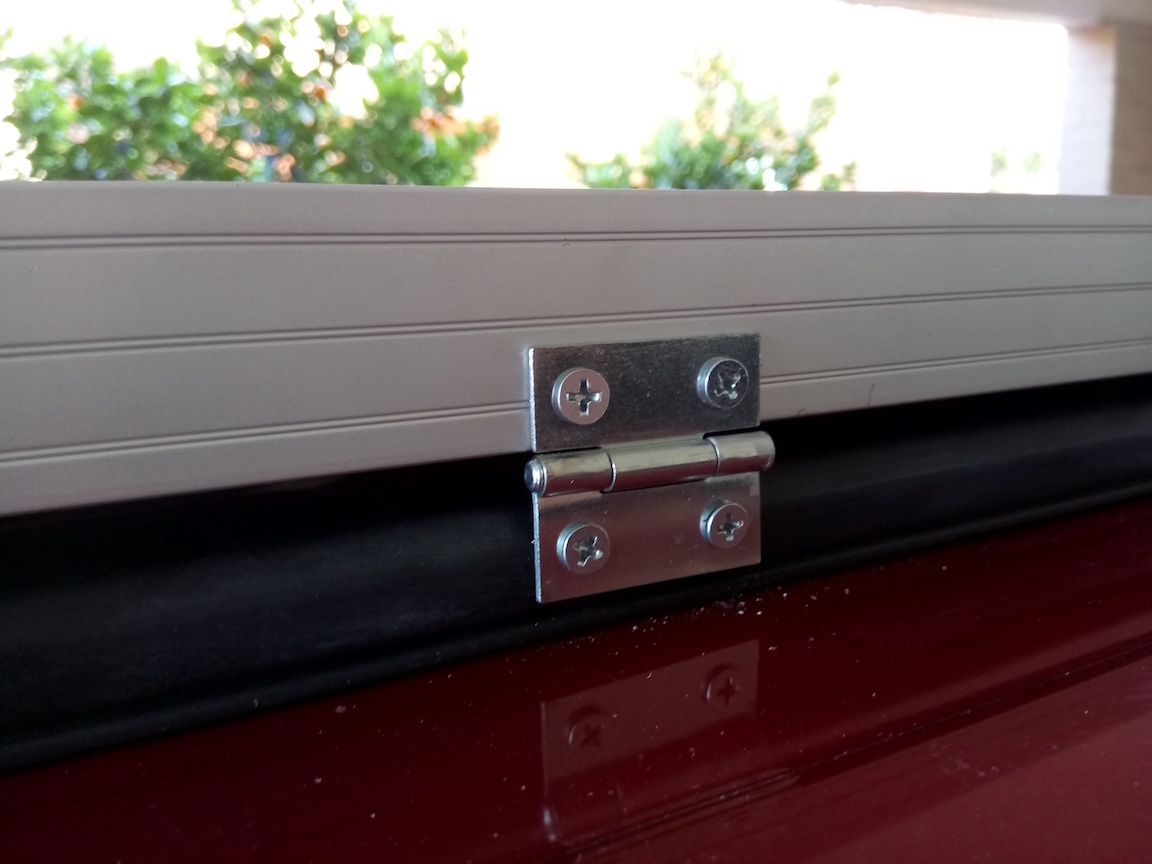
The hinge serves two functions: to allow the raising and lowering of the panel for work on the wiring or cleaning the roof without removal, and to angle the panel to face the sun. I now carry a short wooden stick which readily props the panel to approximately 45 degrees. Eventually, I would like to attach a metal “kickstand” with a set of angles built-in.
The final product is solid, low-profile, and even allows for full use of my roof rack, unobstructed.
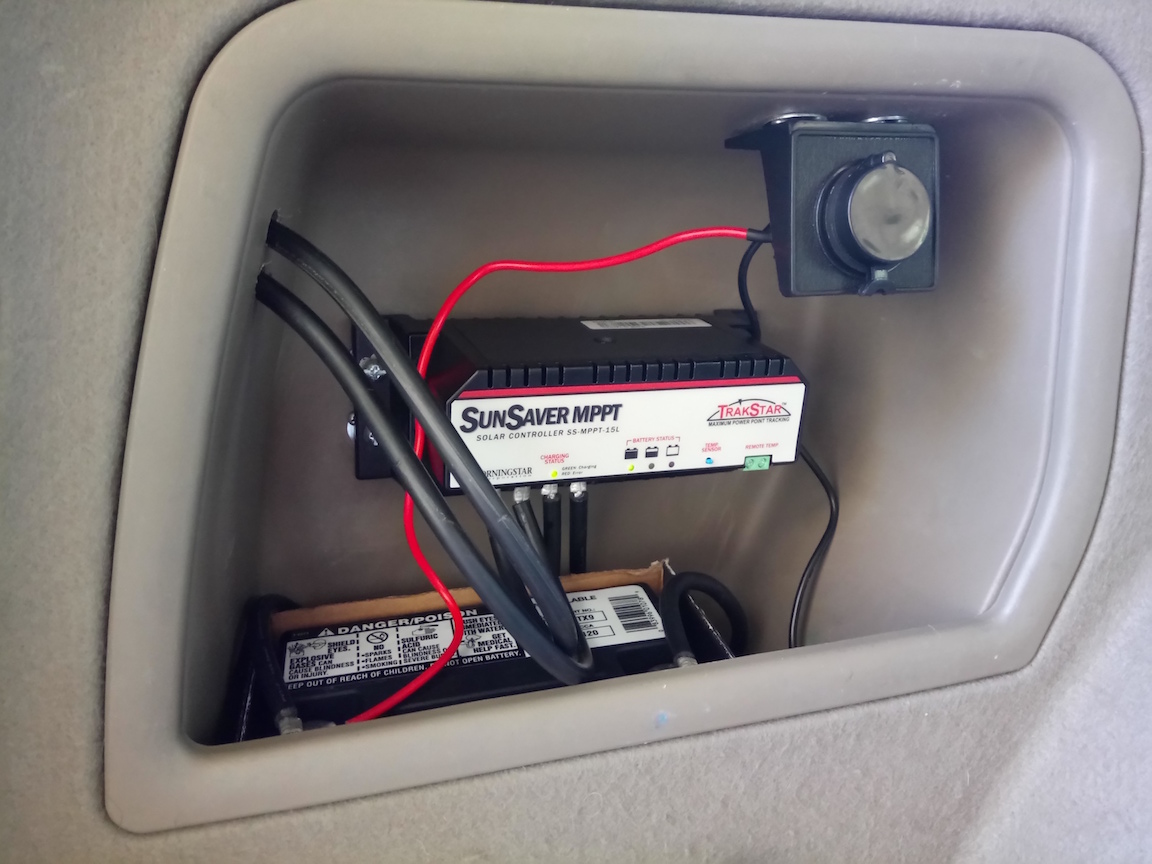
In the rear-left (driver side) cargo pocket I drilled holes to route the positive (+) and negative (-) electrical cables from the panel into the interior space, to the AGM motorcycle battery. The charge controller is mounted to the wall of the pocket (which was a bit tricky, given that no glue would stick to the vinyl). I used T-nuts designed for wood working, applying 3 small screws per T-nut but careful to not strip the forced threading in the thin plastic wall of the pocket. Again, this is specific to my installation. The new 12V power socket was affixed using the same T-nuts and a total of 6 small screws, 3 per T-nut.
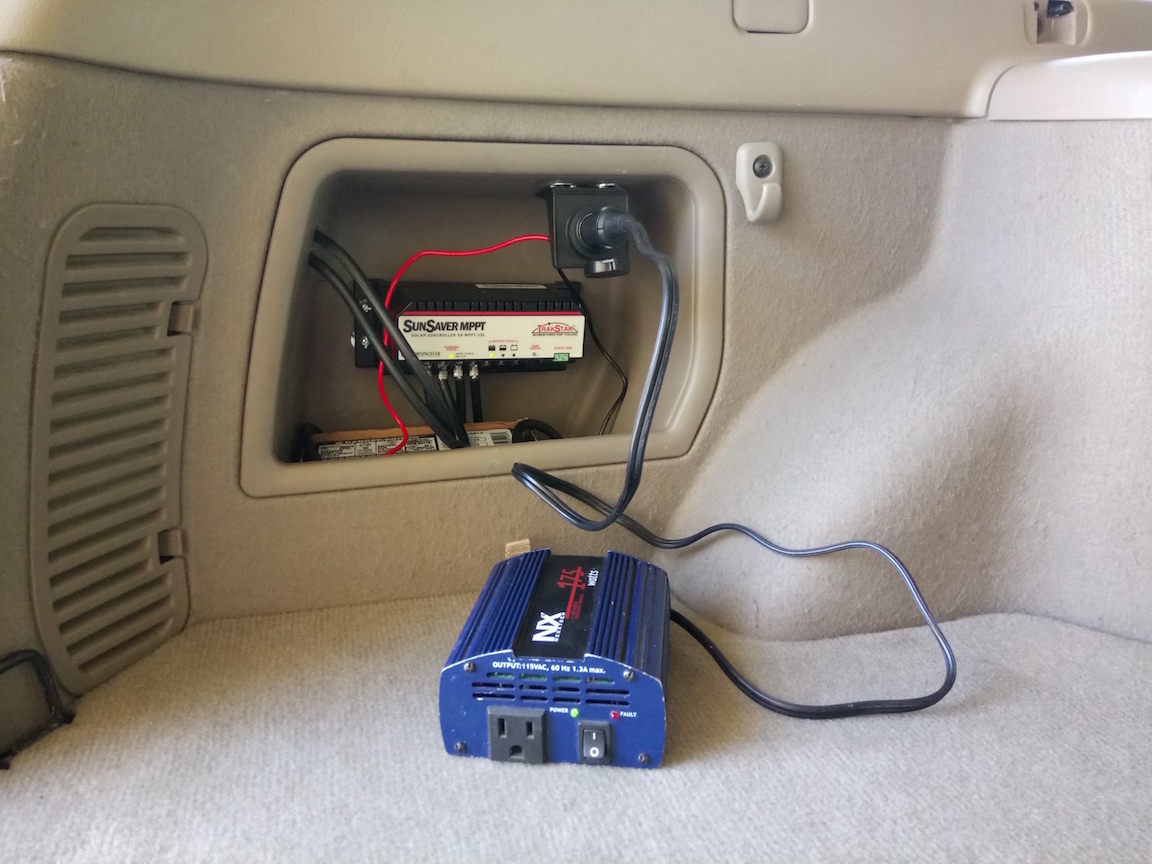
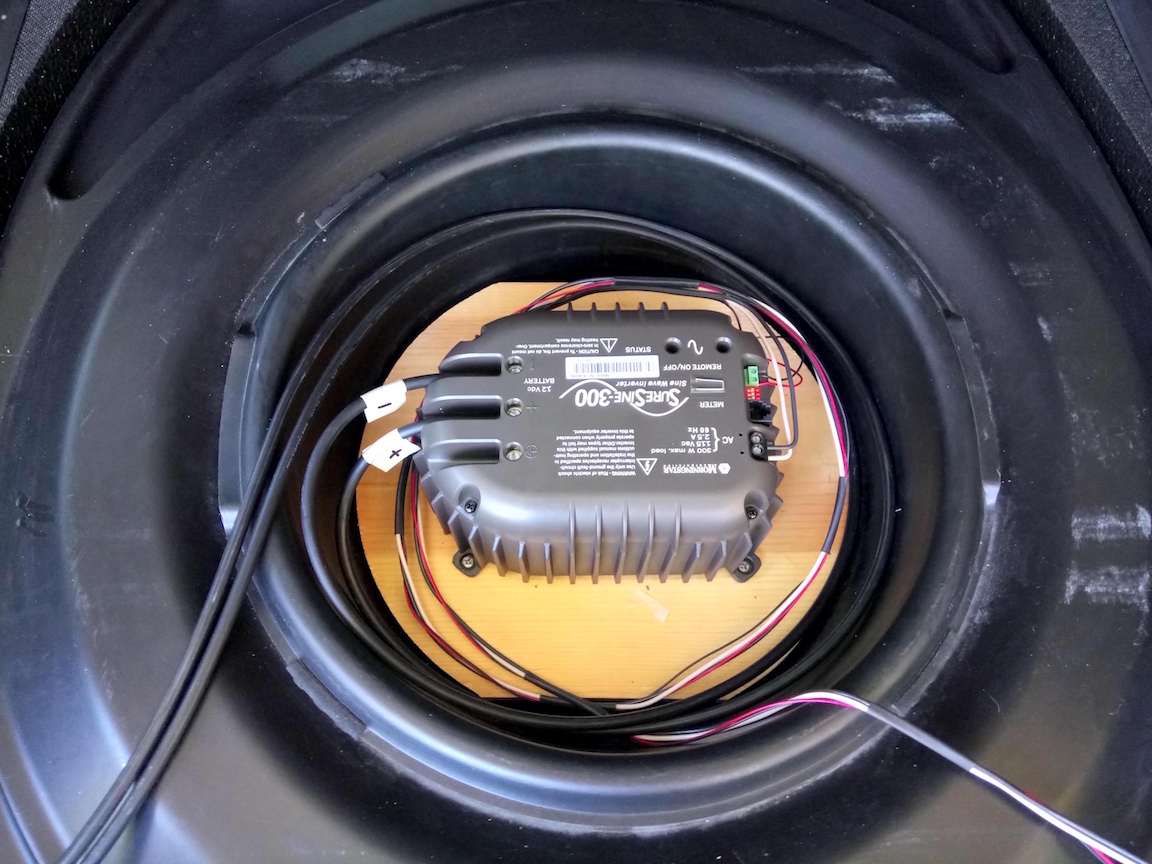
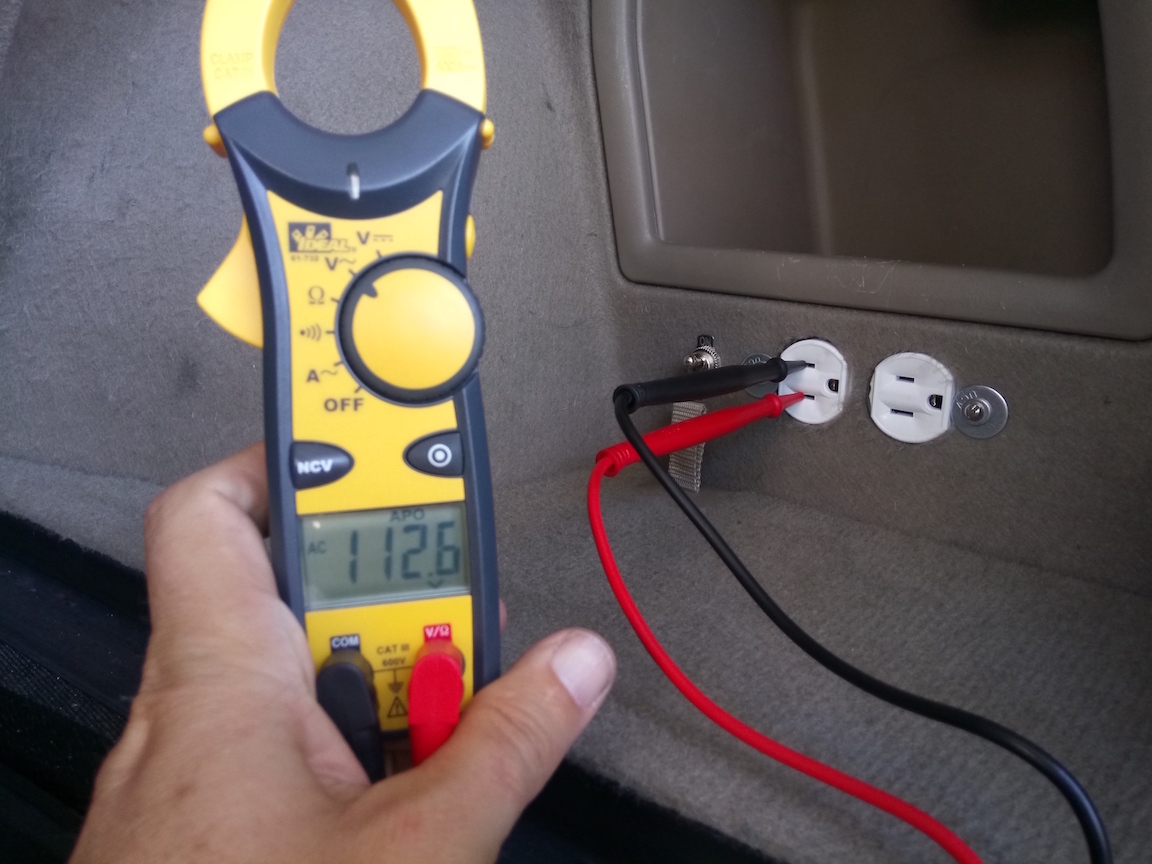
In the rear-right (passenger side) cargo pocket I mounted a standard, household A/C socket and toggle switch connected by 18g wire to the Morningstar 300W inverter mounted on a slab of wood (cut to fit neatly in the bottom of the plastic bin) just above the spare tire. The wire from the inverter to the socket is standard 14g as required in home wiring.
The end result is A/C power from either side, or both, whenever I need it.
The AGM motorcycle battery is ample (without the sun up) to provide one full charge of my Apple PowerBook Pro. Seems low, but when I run the numbers it makes wattage sense. It is incredible how much power is stored in Lithium-Ion batteries but at 1/10 the physical volume of the AGM. For now, it serves its purpose perfectly, providing power to get through the evening hours and into the night with my laptop and cell phone charging, a low-wattage LED work light. By day, I have all the power I need.
I now have a completely separate electrical system which leaves my car’s primary battery to start the car. Should it ever die, I simply run a cable from the original rear power socket to the new socket I installed, positive-to-positive, negative-to-negative (parallel wiring) and I can charge the dead battery from the rooftop solar PV panel.